Minimal configuration
- When powering from an 802.3af Power-over-Ethernet (PoE) injector, plug the network cable into the port marked "LAN."
- When powering using the supplied wall power adaptor, it does not matter in which port you plug the network cable. If you use the power adaptor, please connect the network cable before connecting the power adaptor to your telephone.
- Press MENU/BACK to determine your telephone's network address, such as 192.168.1.20.
- On a PC, point a browser to your telephone's network address, such as http://192.168.1.20/, and log in. You may log in as "user" or as "admin"; the default password for both is "1234" (without the quotes). Many settings are not accessible when you log in as user.
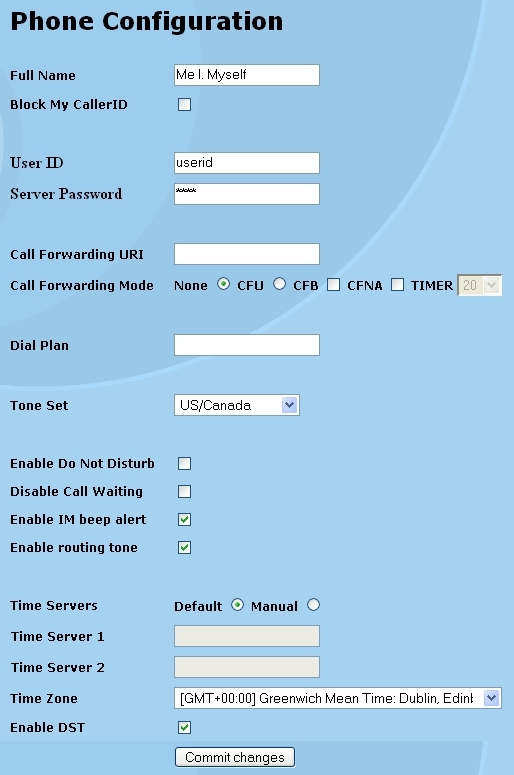
- On the phone-configuration page, enter full name, user id, and
server password. Press the commit button.

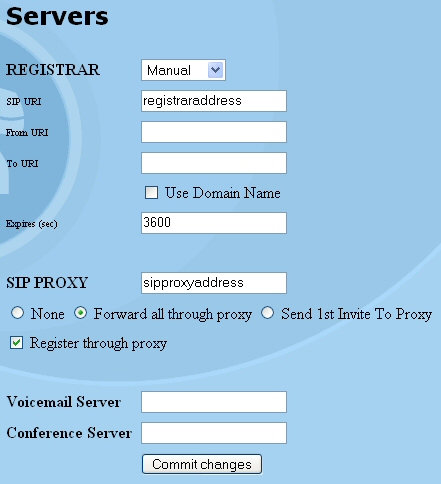
- On the servers page, select Manual registration, enter the registrar address
in the SIP-URI field, outbound proxy address in the SIP-proxy field, check
the register-through-proxy box, and select the forward-all-through-proxy radio button.
Press Commit.

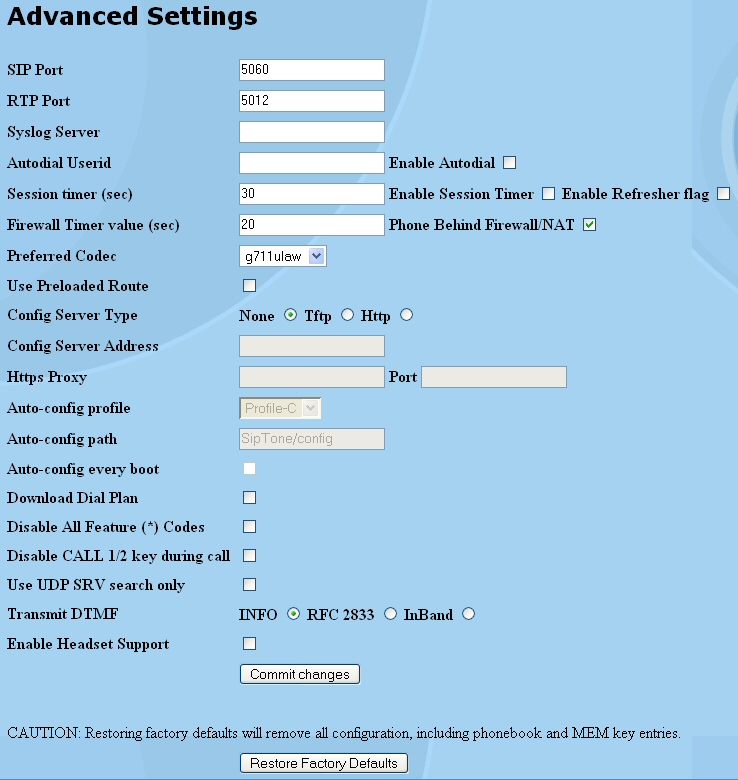
- On the advanced page, select INFO for the transmit-DTMF method. Check the
phone-behind-firewall/NAT box, and enter 20 seconds for firewall-timer-value.
Press Commit.

- You may specify a dial plan on the phone-configuration page (see above) to
remove the need to press DIAL/REDIAL after dialing a number. An example North
American dial plan where you need 9 to dial out and where internal four-digit
extensions start with 5 is
(9[49]11|91xxxxxxxxxx|5xxx|9[2346789]xxxxxx|9011x.T)
Copyright © ipDialog, Inc. 2002-2006 All rights reserved.